Tally Prime is the latest version 2022 of Tally ERP 9 that has some advanced features. Creating Company in Tally Prime is necessary as it records all the Company’s financial transactions in it. In simple words, it’s just like how you create a book for registering your business transactions; you need to create a company to record the transactions in TallyPrime. In this article, you will learn about Company Creation in Tally Prime:
You can view and update all the transaction entries when needed and get the financial reports through the company. You may also check Tally Ledgers Groups List.
First, you need to Create Company by entering the necessary details. One has to enter their Company’s name, address, and other information, like a financial year, security, and base currency information.
Once all this information has been entered and created by your Company, you can access the accounting, inventory, payroll, and taxation features based on your business preferences. If applicable, one can also specify the tax registration details, such as GST, VAT, Excise, TCS, or TDS, that can be accounted for future transactions.
Steps to Create Company in Tally Prime
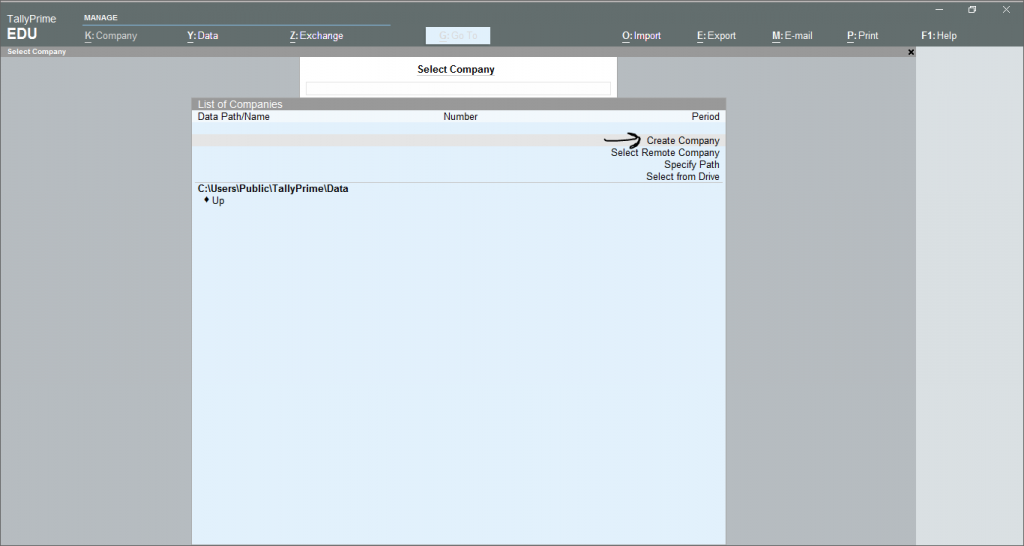
- After launching TallyPrime from your desktop and selecting Educational mode (if not Purchased the license), select Create Company in Tally Prime.
- If you already have one company registered in Tally software and would like to create another company, press Alt+K (Company) > Create.
- One can create multiple companies in TallyPrime, maintain transactions separately for each business, and manage each company’s returns accordingly.
2. Now you can Provide the Company details.
- Enter your company’s Name: In TallyPrime, this name will appear whenever you need to select the company. For example, Max Electronics.
- Enter Mailing Name and Address: Your mailing name and Company name can be the same if you want. This mailing name & address will be printed in all the invoices and reports. For example; Company Name- Max Electronics, Mailing Name- Max Electronics Pvt Ltd.
- Enter the State, Country, and other contact details: You need to enter your company’s State, Pincode, Mobile number, email, Period of financial year and currency. An example has been shown in the sample image below. These details can be printed on your invoices if needed.
- Security: You can also enable security features such as TallyVault and User controls for your company. If you do not see the Security option, press F12 (Configure): > set the following options to Yes:
- Use TallyVault Password to encrypt Company Data
- Use User Access Control – You can create different usernames and passwords to secure company data for different users.
You can alter these details anytime by Pressing Alt+K (Company) > Alter. In the Company Alteration screen, make the necessary changes.
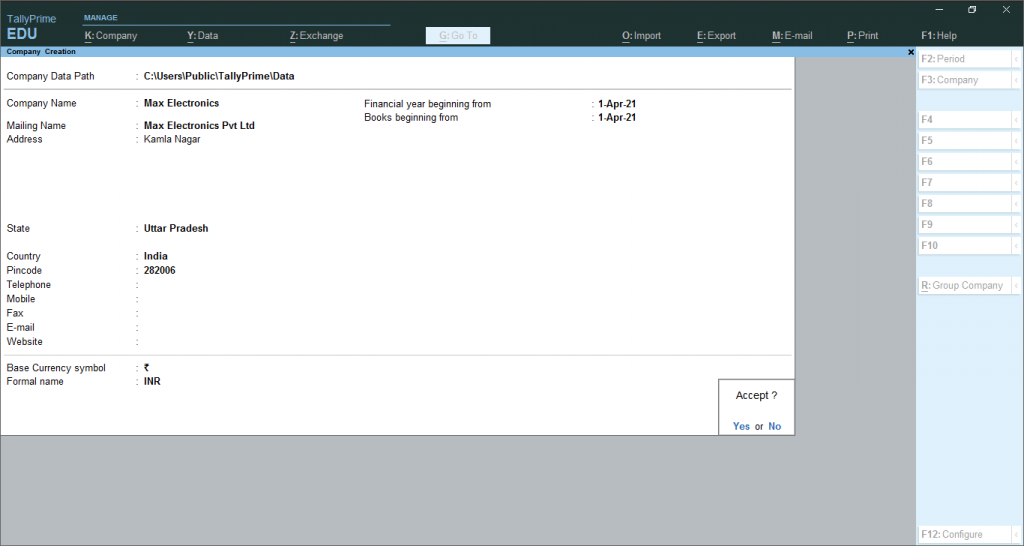
3. Accept the screen. You can always press Ctrl+A to save the details, and you have created the company successfully. After Saving the company, the Company Features screen will display that says the company is completed successfully.
- Set the Show more features option to Yes.
- Set the Show all features option to Yes.
- You can make the changes to the features anytime by navigating to the features screen> pressing F11 for features.
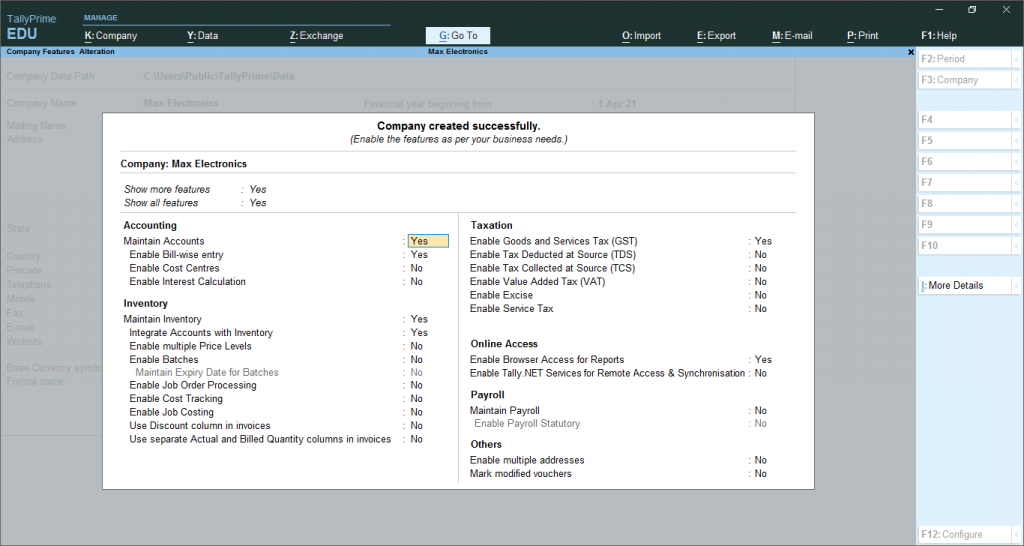
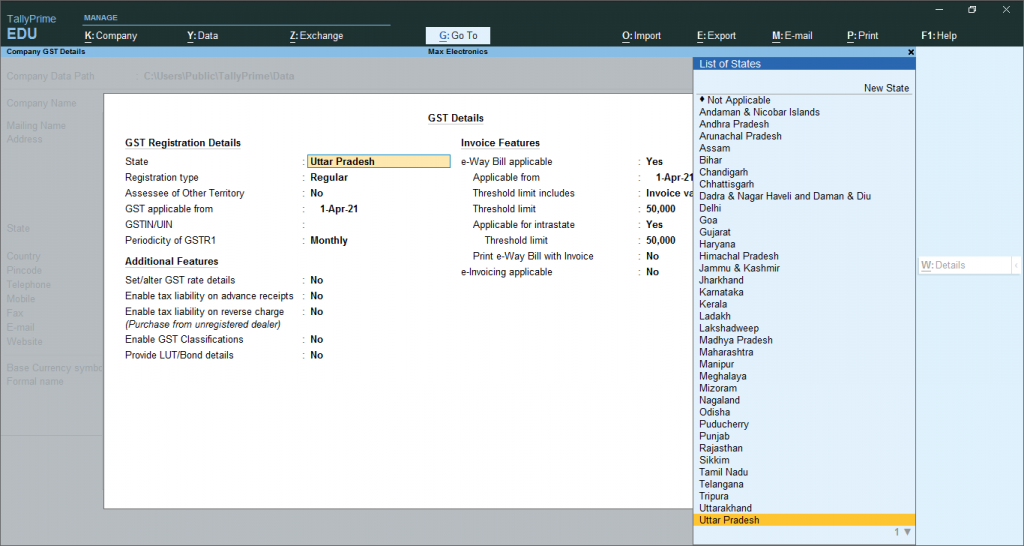
- Click ‘Yes’ to features that are required, according to your company requirements. To enable GST, click yes on GST. A screen will open as shown in the image below
- Now Set your company GST details and click Ctrl+ A
4. After you have created the company, in the Gateway of Tally screen, the company name appears in bold under the name of the Company. Now, you are ready to record transactions of your company.
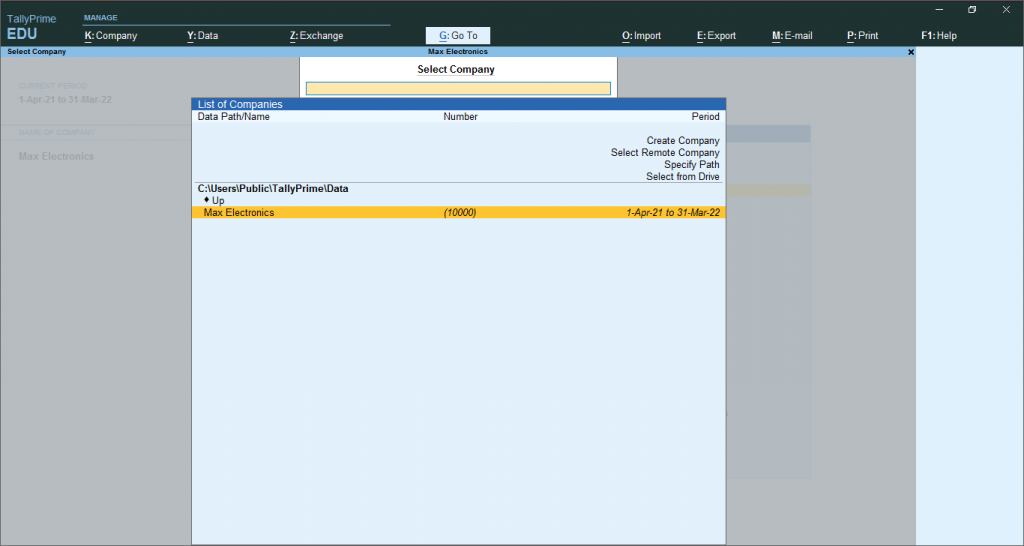
- Load the Company: Open TallyPrime > Alt+F3 (Select Company) > and select the company from the List of Companies.
- If you have created more than one company, you can browse to the data path and select the required company to open.
Delete a Company in Tally Prime
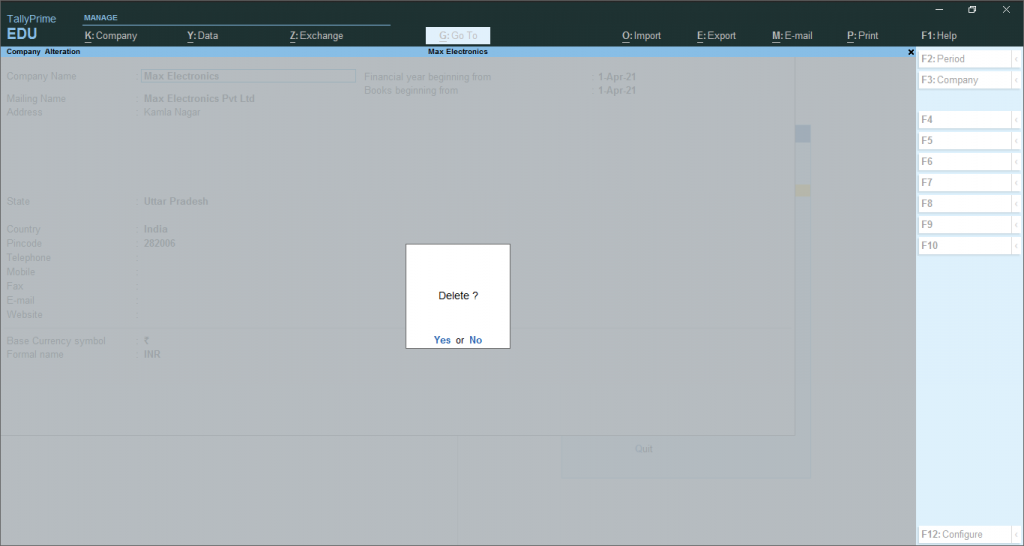
In Tally Prime, a user can quickly delete the company. However, after deleting a company, it will remove the company’s information from the Hard disk. All the directories and files that are associated with the company will be permanently deleted. To delete a company in Tally prime, follow the steps mentioned below:
- Go to Gateway of Tally> Press Alt+K → Alter → Alt+D
- The company information will display on the screen after using Alt+K keys.
- Now, click on the alter option.
- Click on Select Company > click Alt+D. After this, click on the YES option to delete the company.
Recommended Articles:

